Step 1: Connect your printer to your PC using a proper USB cable (not Ethernet or Wi-Fi). Launch WIC Reset Utility and ensure that your printer is detected by the WIC utility.

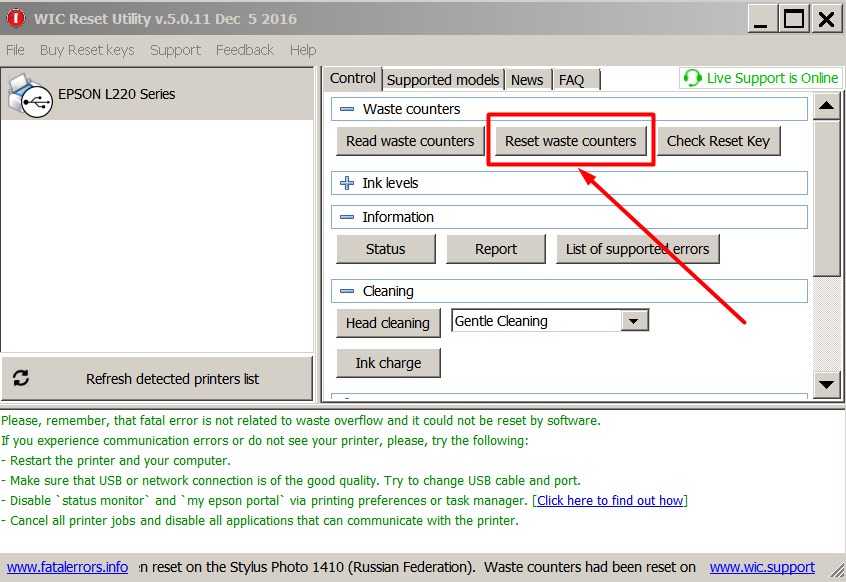
Step 2: Click on the "Reset waste counters" button under the "Control" tab.
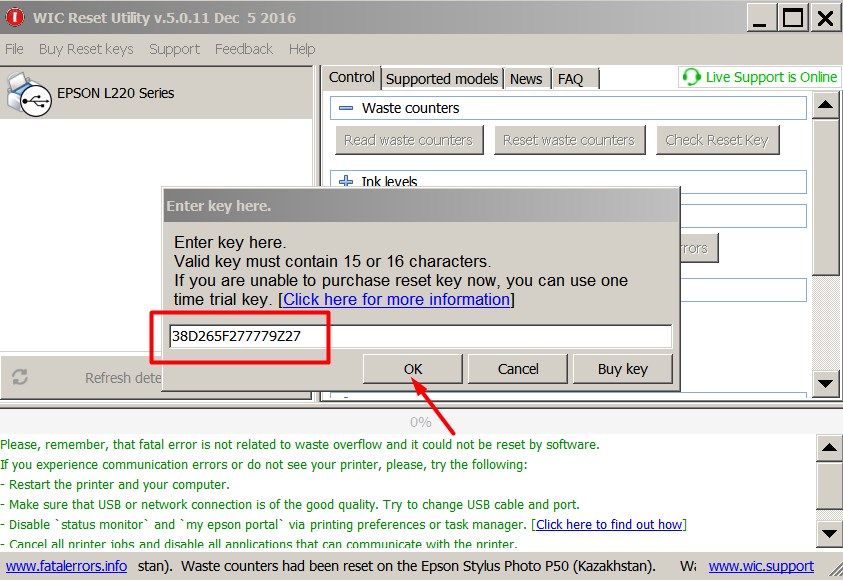
Step 3: Enter the Reset Key you received via email and click the "OK" button.
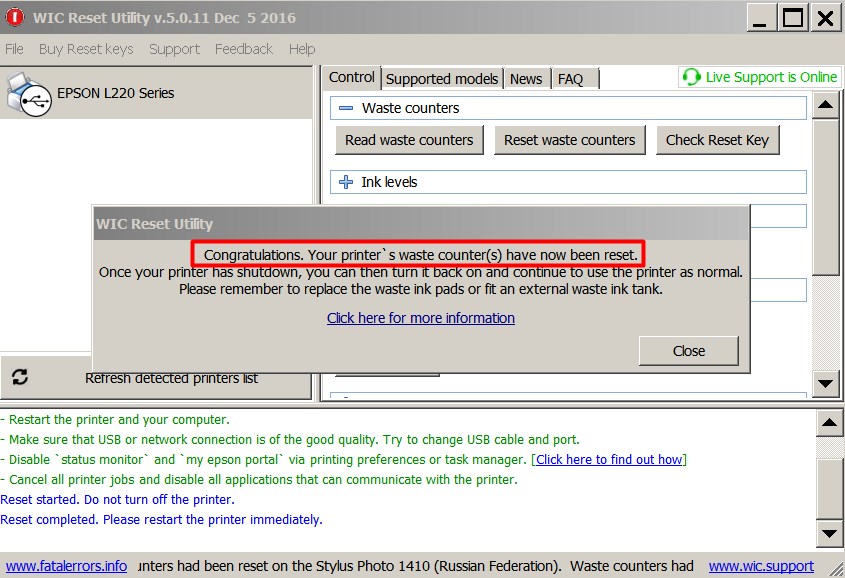
Step 4: If the counters reset successfully, you will see a message confirming that your printer's waste ink counter has been reset.
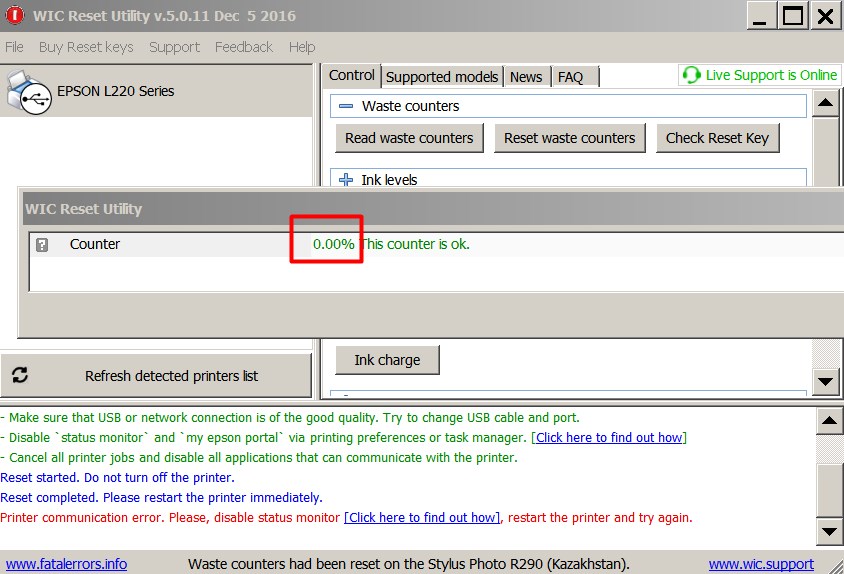
Step 5: To ensure that your printer's waste ink counter has been reset successfully, click on the "Read waste counters" button under the "Control" tab.
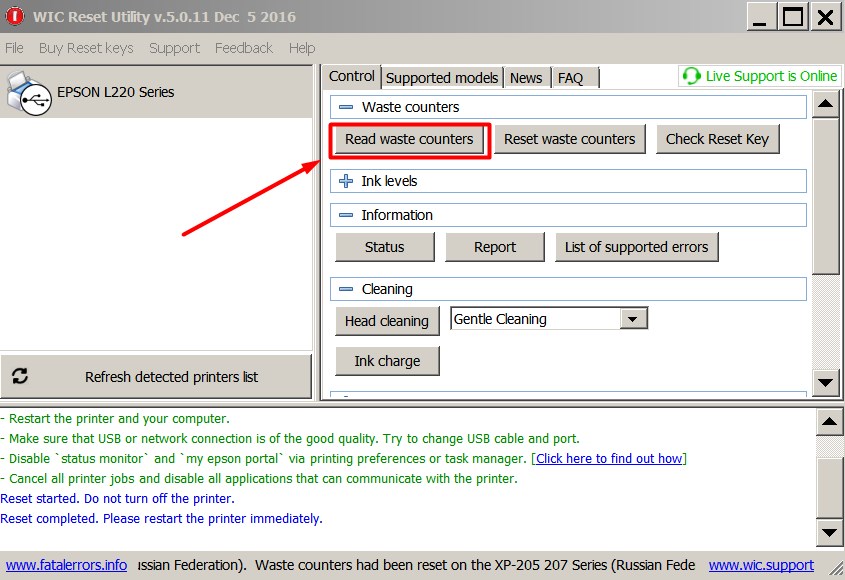
Step 6: You will notice that the state of the printer's waste ink counter is now at 0.00%.
You can also watch a video tutorial How to Reset Waste Ink Counters using WIC Reset Utility